How I Built My Own Backyard Sauna in Tahoe (And What I'd Do Differently)
How I Built My Own Backyard Sauna in Tahoe — And What I Learned
I didn't start Tahoe Sauna Company because I had a construction background. I started it because I got tired of the gym sauna — small, crowded, strangers — and decided I'd rather build my own.
That was about five years ago. I had no contractor license, no framing experience, and a genuine obsession with Finnish sauna design principles that had developed over a few months of deep research before I touched a single board. What I ended up with was an imperfect but well-functioning outdoor sauna that has survived every Tahoe winter since, heats to 170–200°F consistently, and required almost no maintenance.
Here's how I built it, what I got wrong, and the three things that actually determine whether a DIY sauna works.
The Build: From a Dirt Patch to a Working Sauna
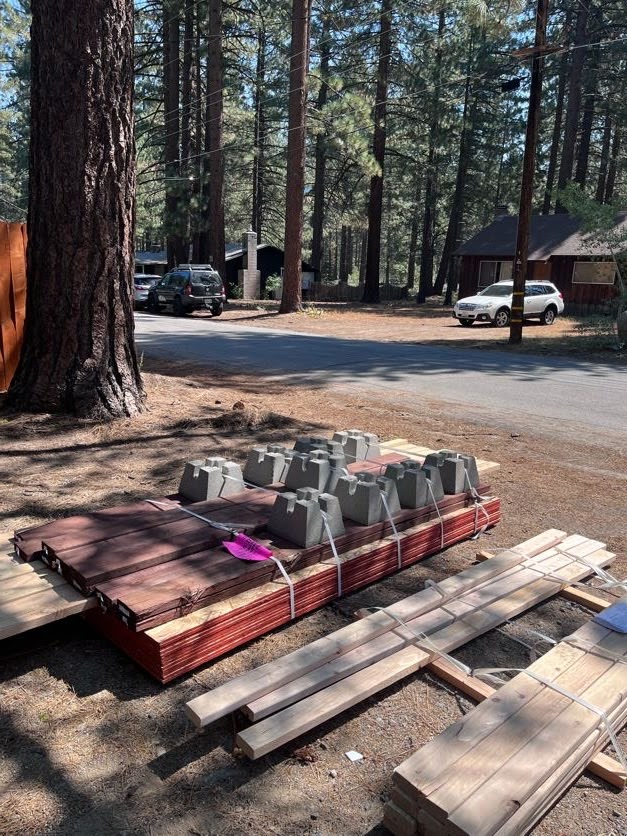
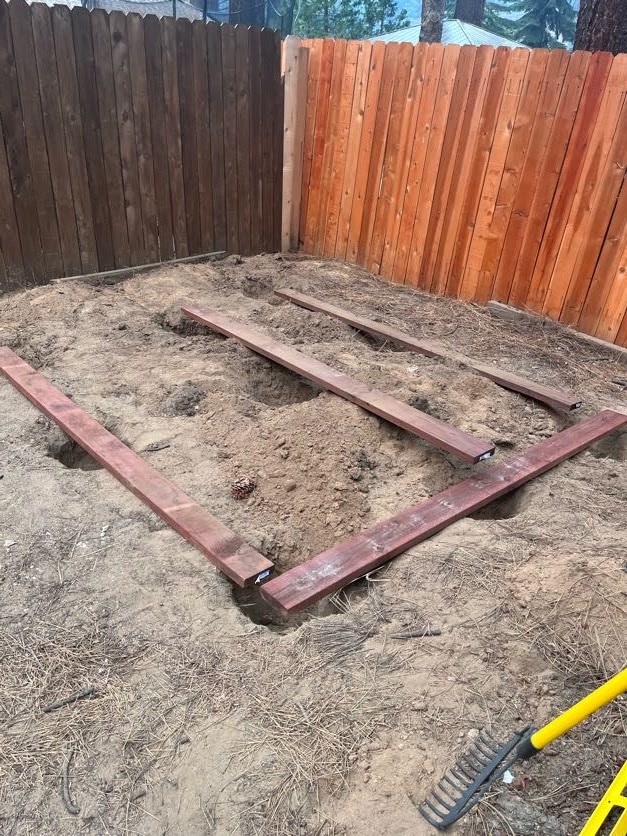
The first step was the foundation. I leveled a patch of ground, set nine concrete deck block footings on a compressed gravel base, and installed pressure-treated 2x6 floor joists on top. Getting everything level at this stage matters — it makes every step after it easier. OSB went over the joists to form the subfloor.
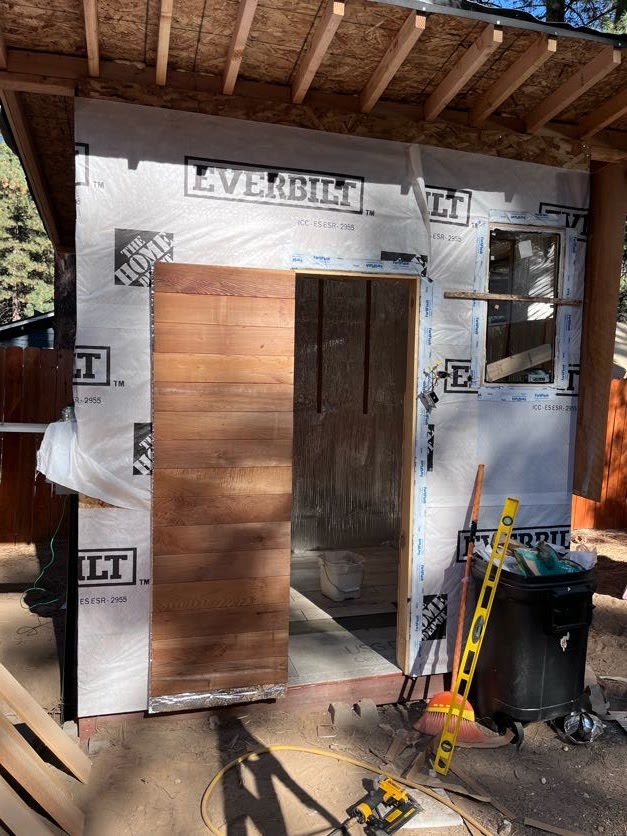
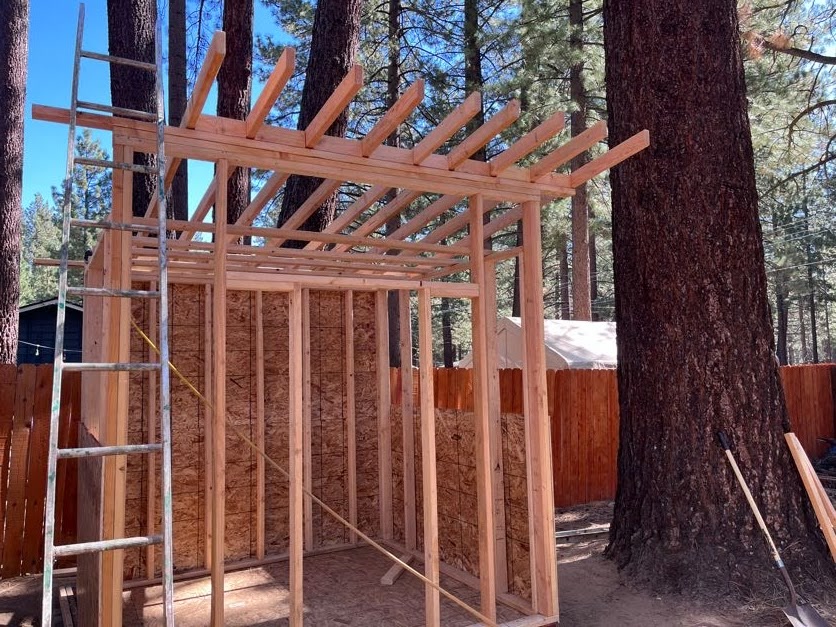
From there I framed the walls with 2x4 studs at 16 inches on center, sheathed them with OSB, wrapped the exterior in building wrap, and put up a simple single-pitch shed roof with asphalt shingles. Nothing exotic. The photos show the structure mid-build — you can see the framing, the OSB sheathing, and the Everbilt building wrap going on before the cedar siding.
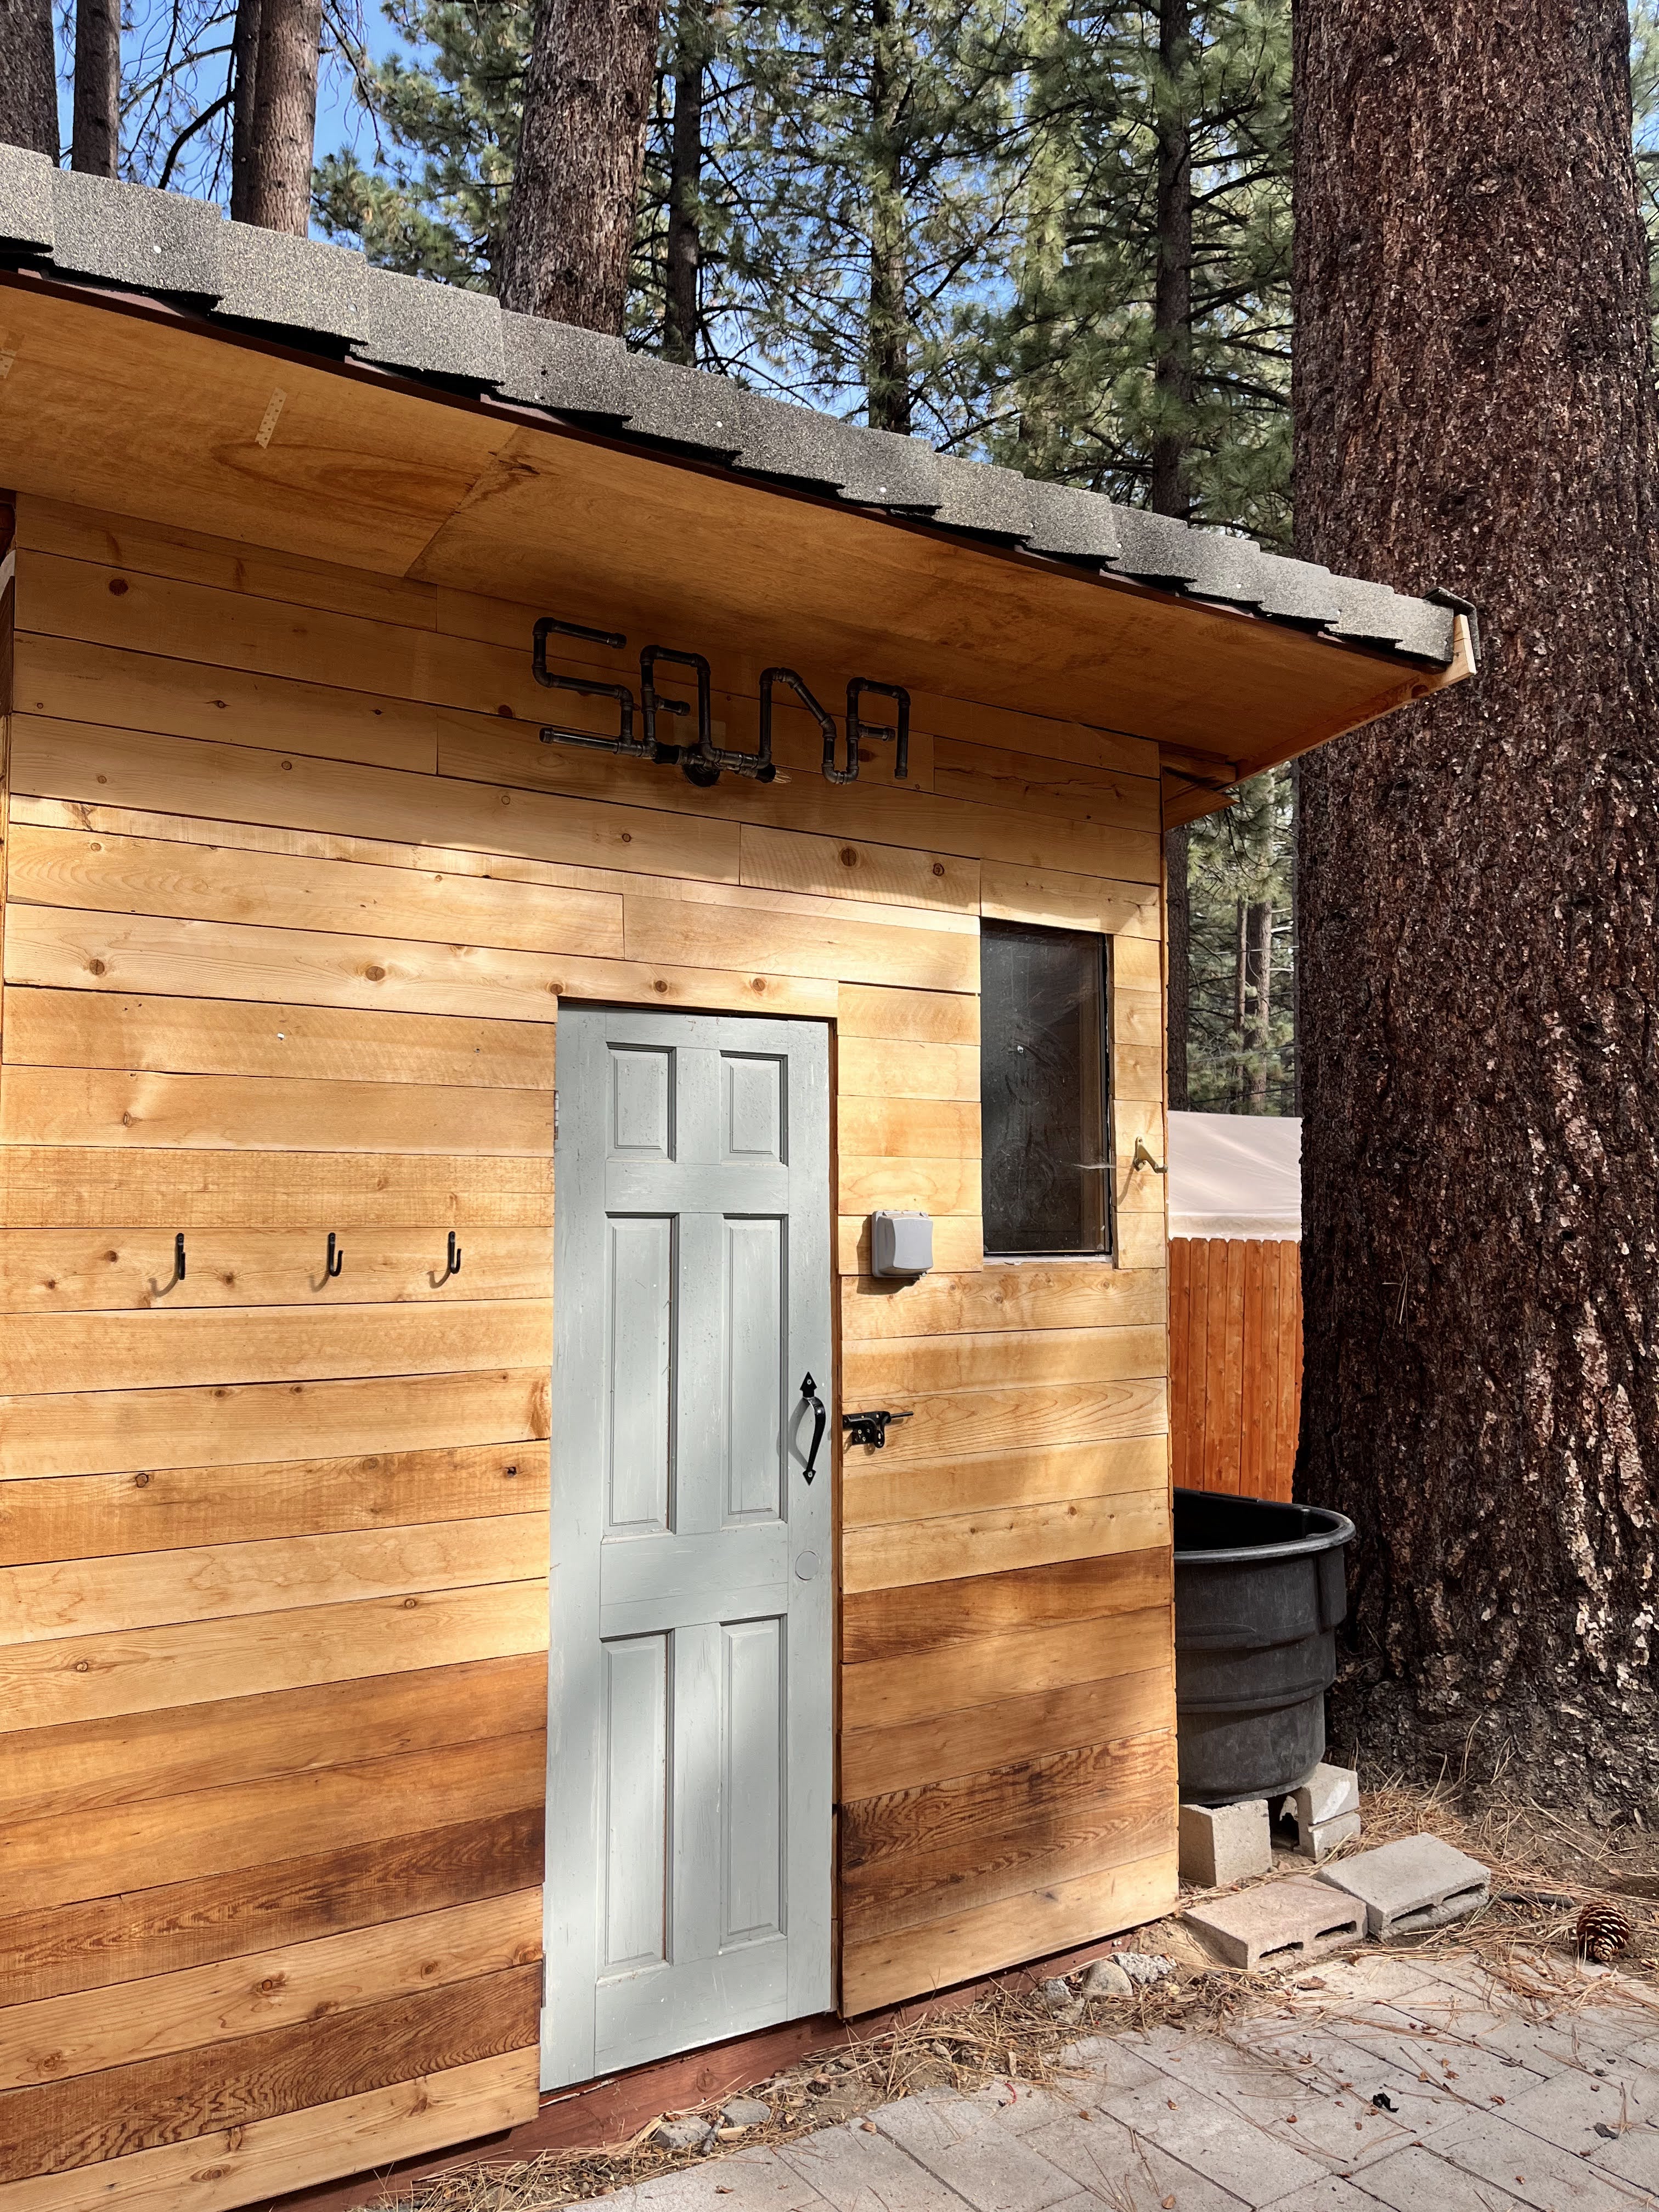
The exterior siding is cedar — installed horizontal with a wood door and two small windows. Simple. The sign above the door that says "SAUNA" spelled out in pipe letters was a nice touch by whoever did the final exterior work.
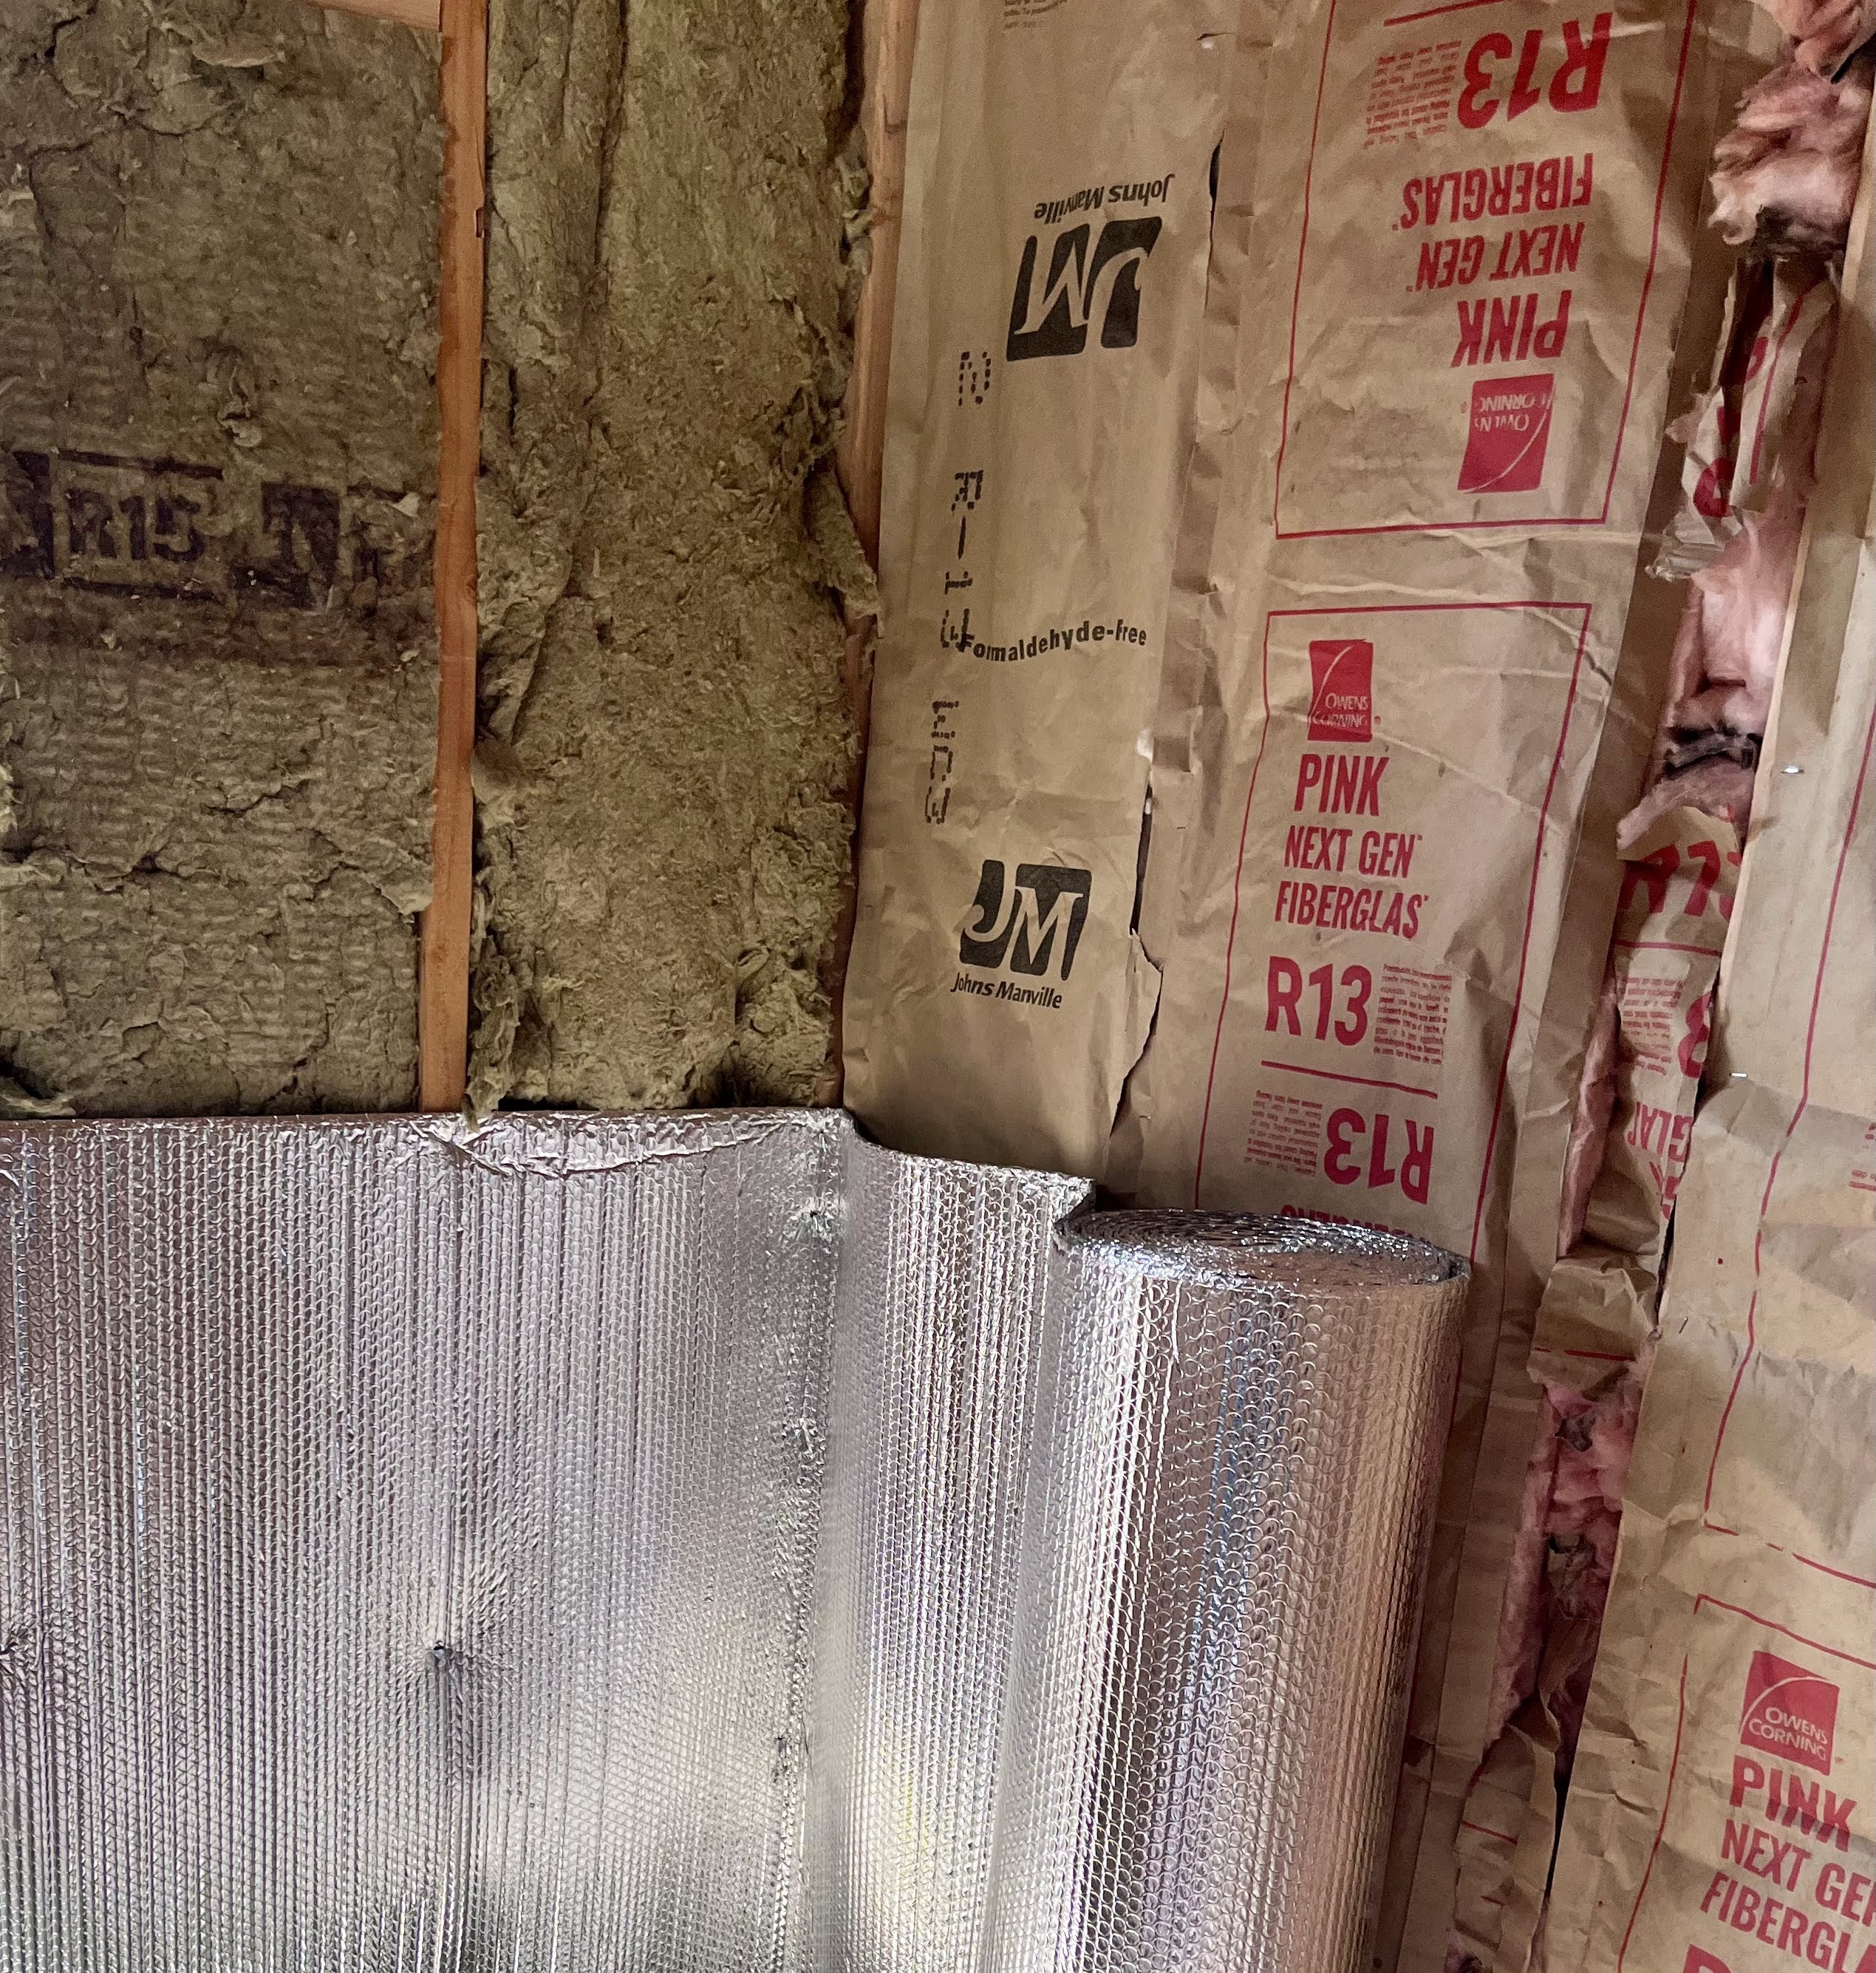
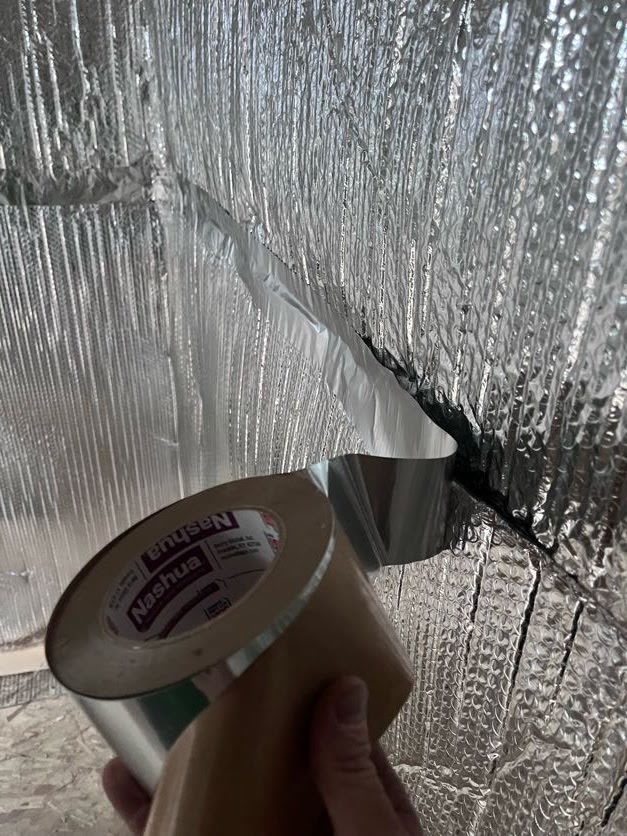
Inside, the wall assembly went: fiberglass batt insulation (R-13 in the walls, more in the ceiling), then a continuous aluminum foil vapor barrier with every seam overlapped and sealed with aluminum foil tape — you can see the Nashua tape being used in one of the photos. Then furring strips to create an air gap, and finally horizontal cedar tongue-and-groove panels.
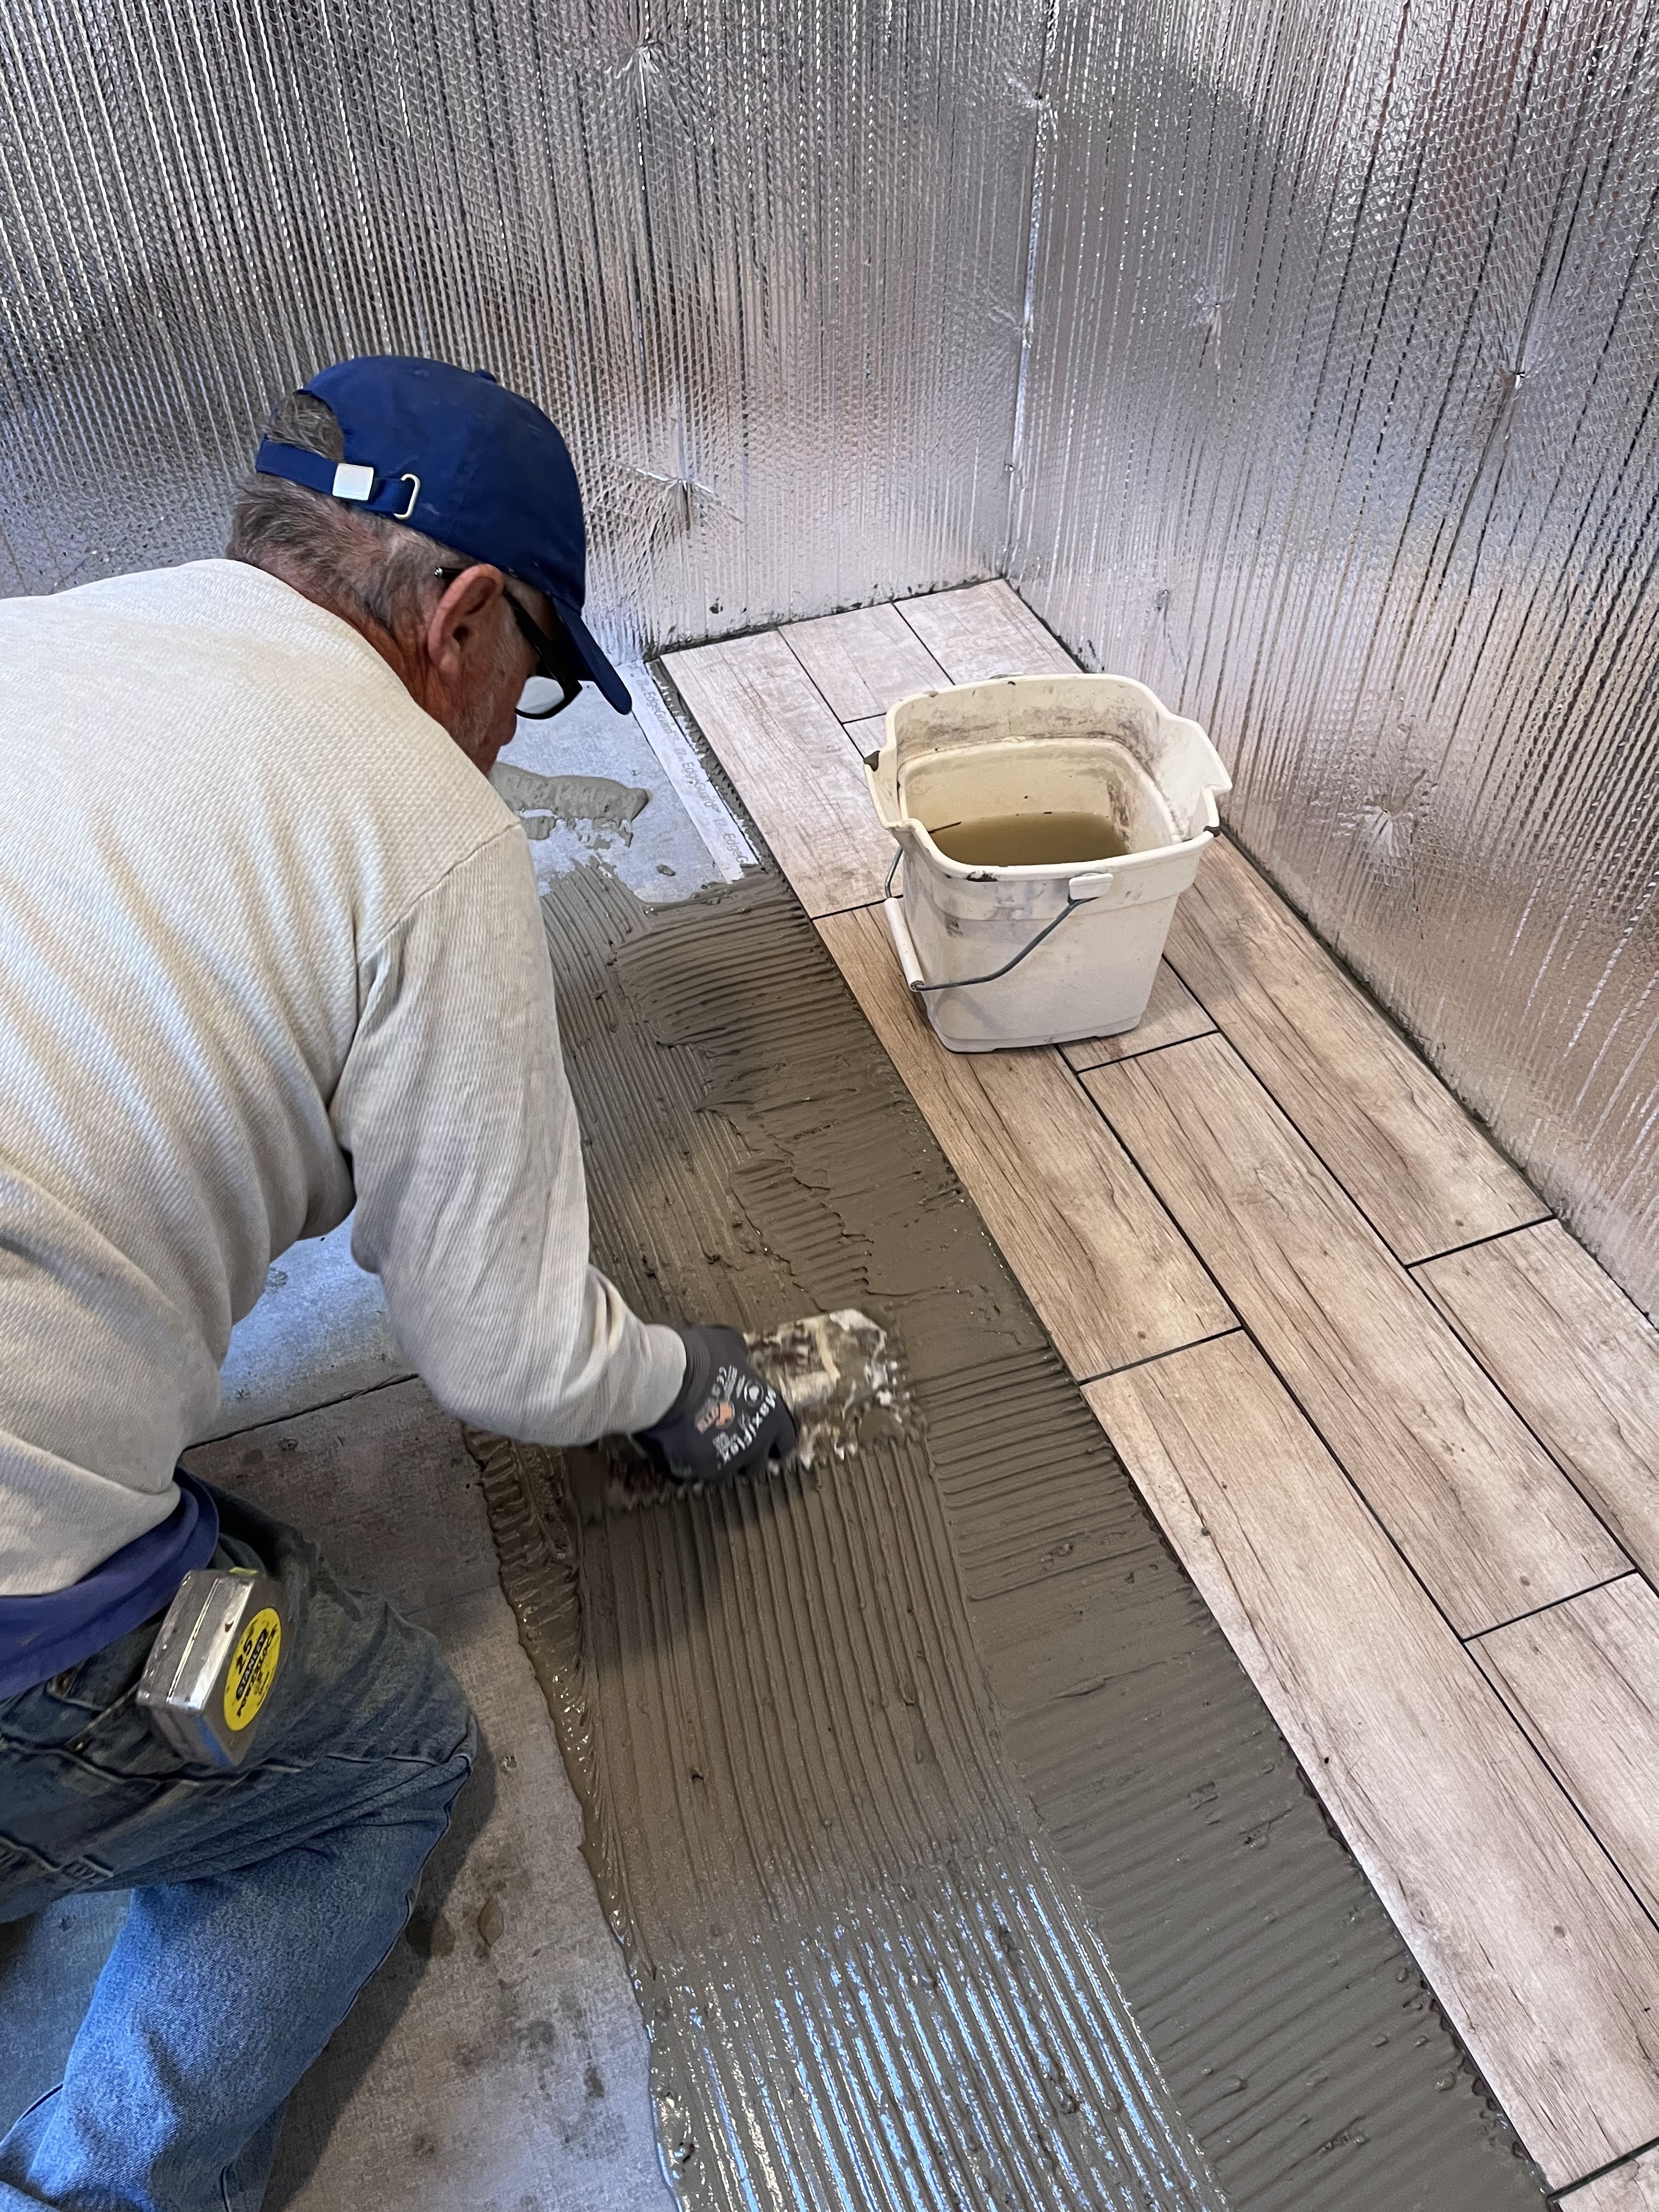
For the floor, a tile setter laid wood-look porcelain tile over mortar — you can see that process in the photos. It's a practical choice: durable, easy to clean, handles moisture well.
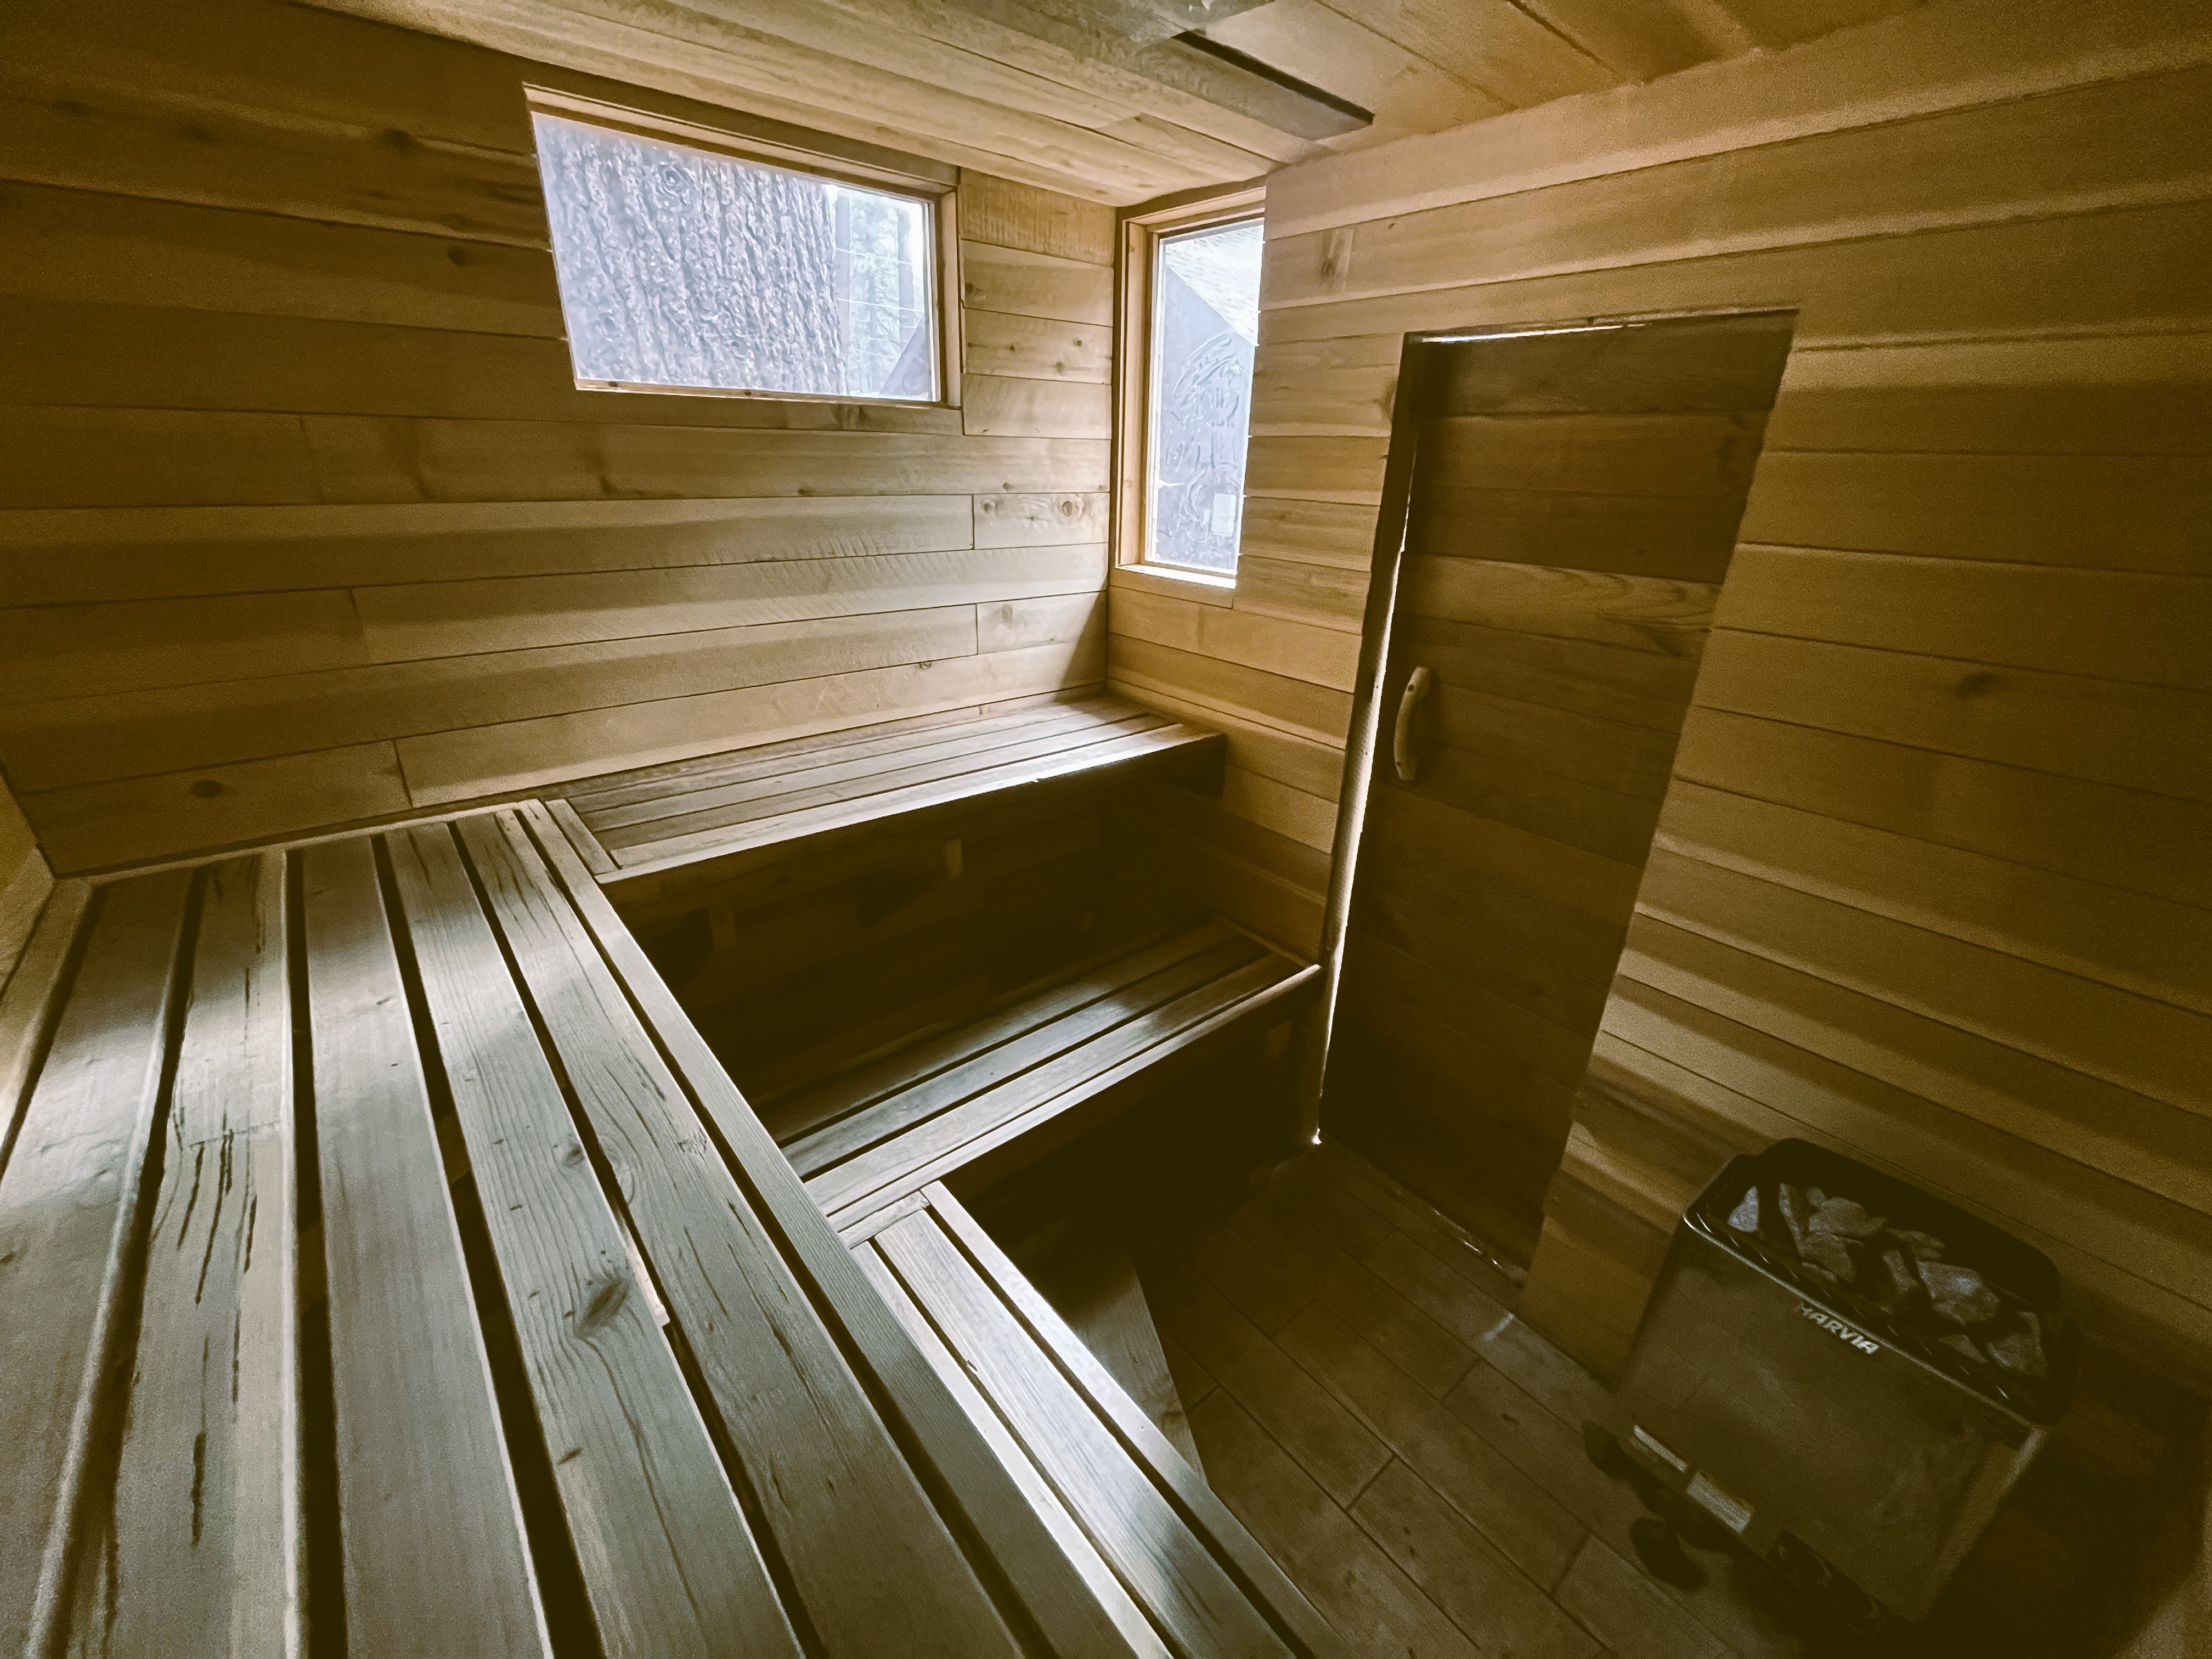
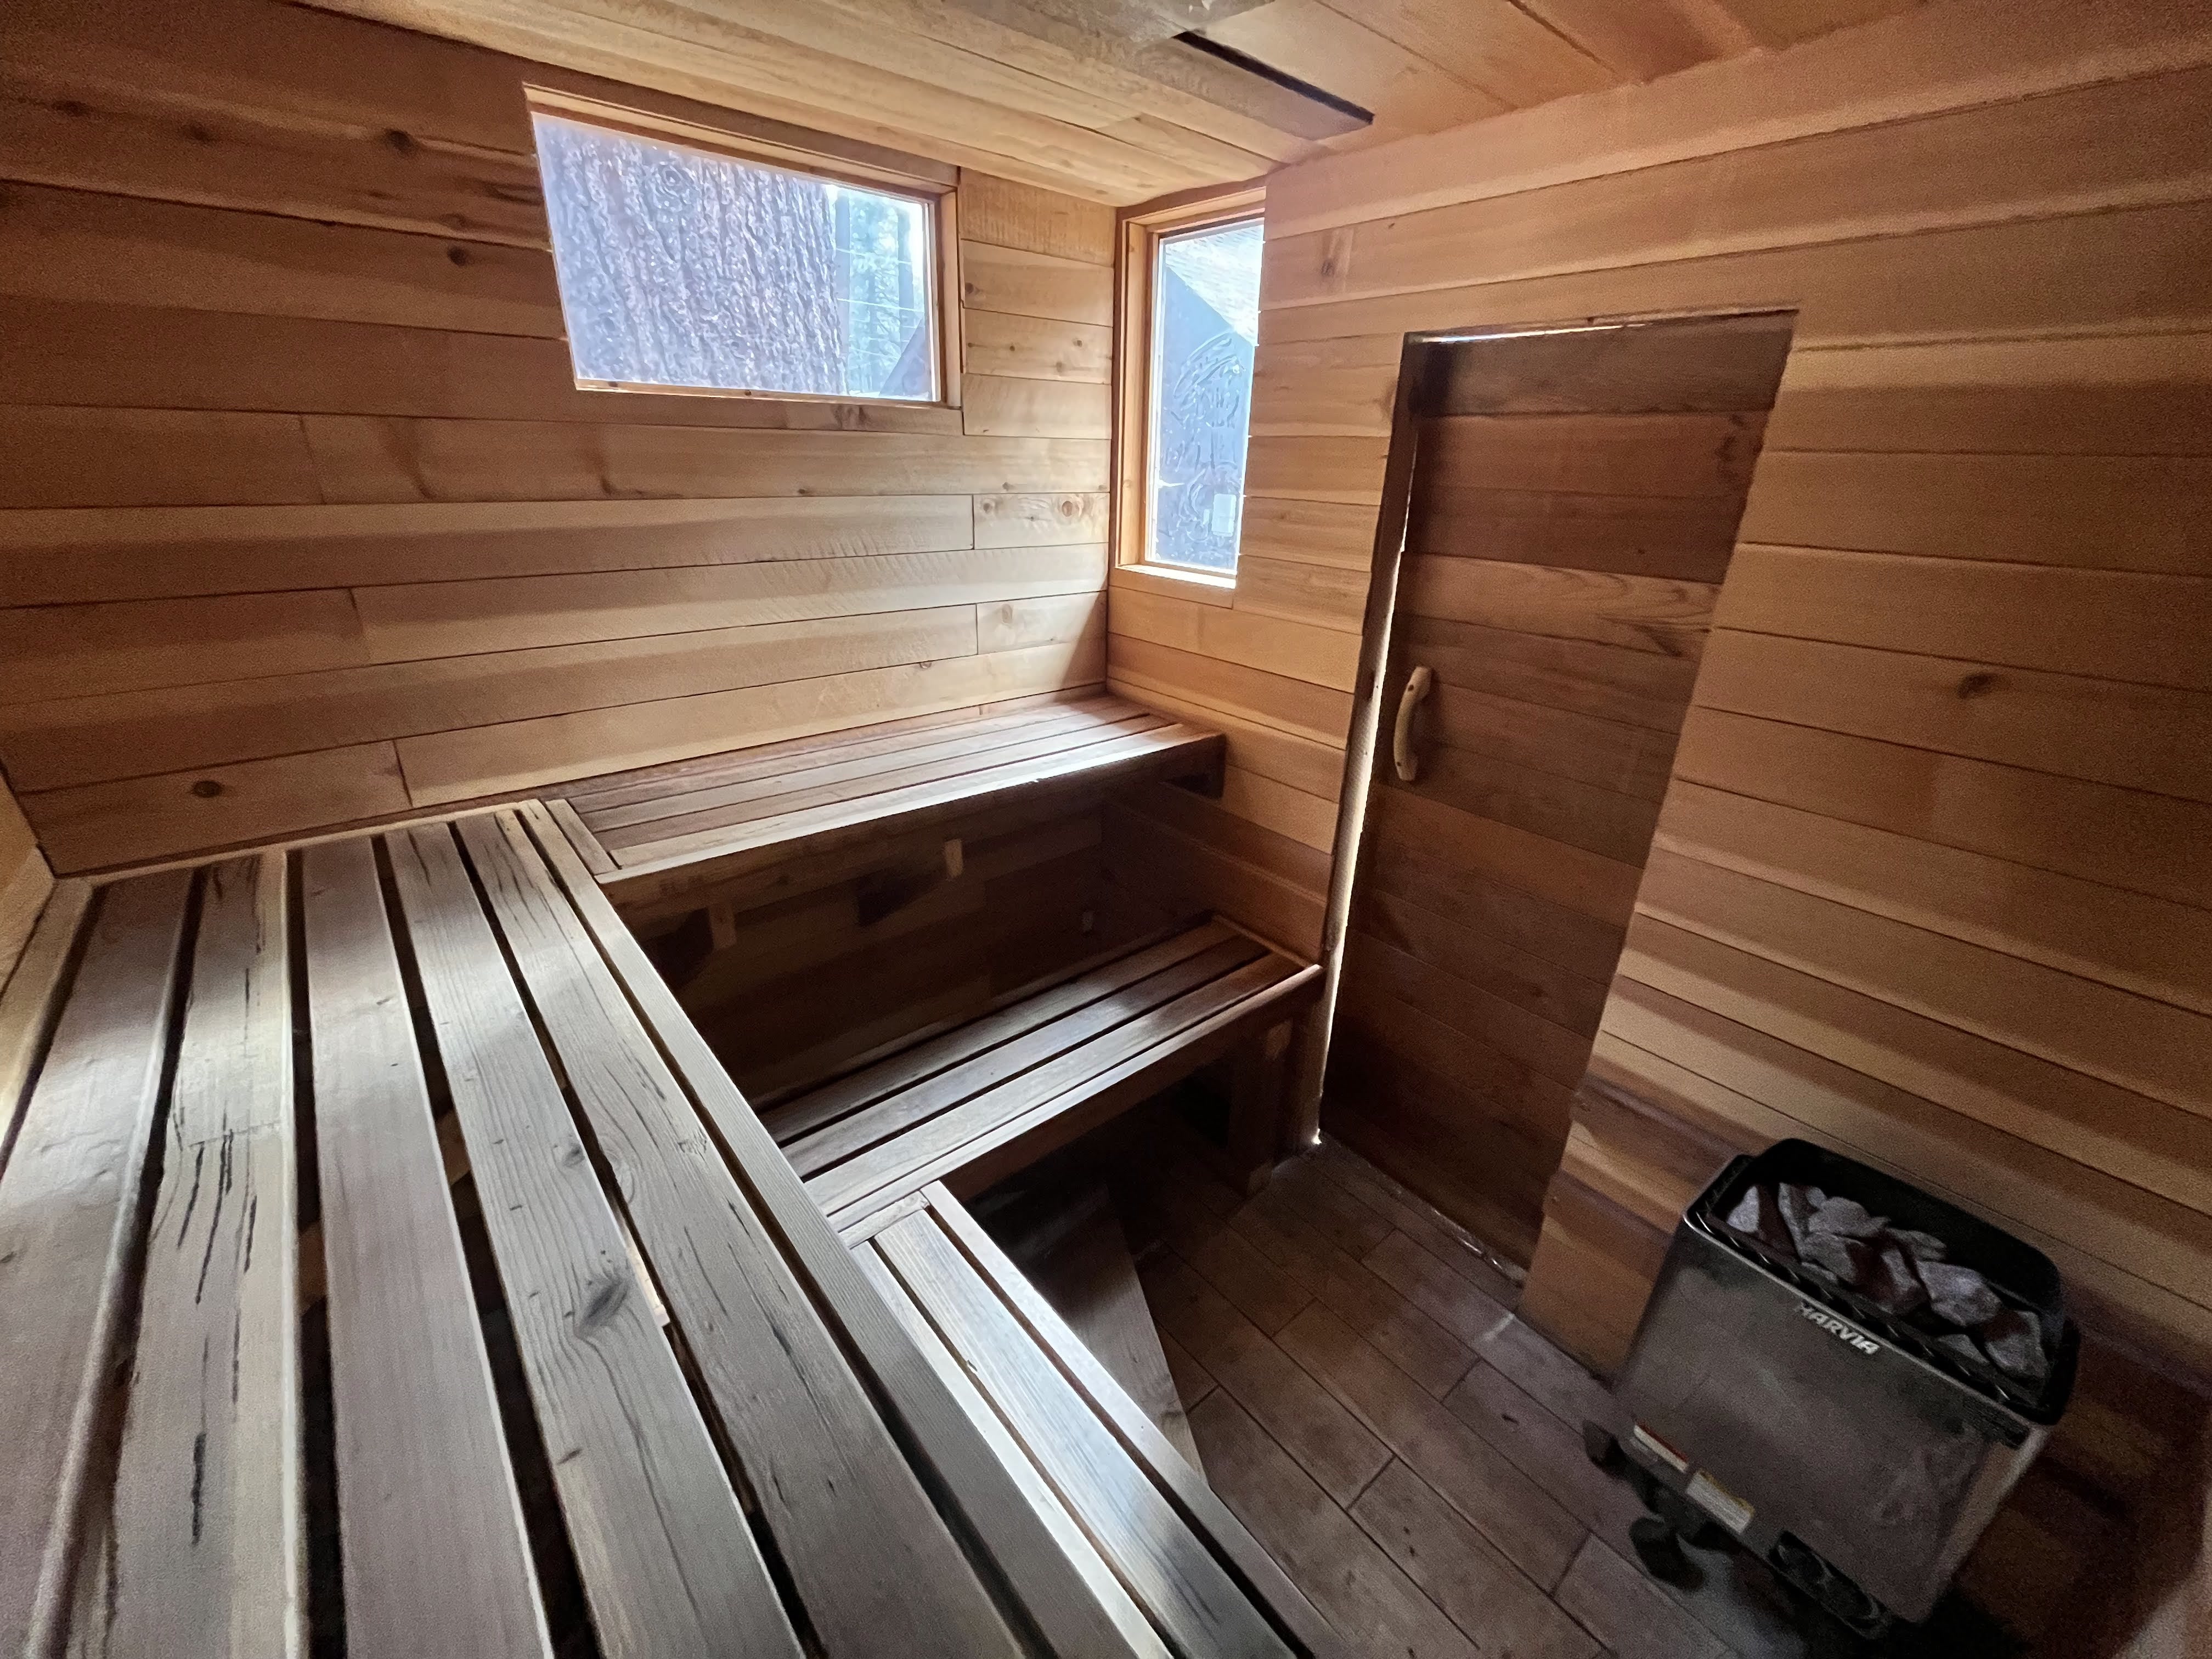
The benches are redwood 2x4s, L-shaped layout, three tiers. The heater is a Narvi electric unit — visible in the finished interior shots, sitting in the corner with a full load of stones.
The Mistakes
I made plenty. The vapor barrier seams on my first attempt weren't tight enough. I underestimated how important ceiling height was and had to think carefully about bench positioning to make it work. I didn't have a ventilation plan at all initially — no intake, no exhaust, just a sealed box. That's a real problem for air quality over a long session, and it's one of the things I'd do differently now.
The result was still a functional sauna. But understanding what I got wrong is a big part of why I eventually started designing them for other people.
The Three Things That Actually Determine Whether a DIY Sauna Works
After five-plus years of using my own sauna through Tahoe winters and designing saunas for clients, I've simplified it to three things. Get these right and most of the other details are solvable.
1. Build It to Last
A sauna is an outdoor structure in a harsh climate. It gets hot, cools down, gets snowed on, dries out, and does it all again. If the structure isn't solid — proper footings, real roof, good exterior moisture management — nothing inside it matters.
This means a real foundation (not just blocks sitting on dirt), a shingled roof that sheds snow, and exterior-grade building wrap before the siding goes on. It also means not cutting corners on the door. A solid wood slab in a custom frame, opening outward, with a simple magnetic latch. Pre-hung doors often contain adhesives and finishes that offgas badly in heat.
2. Insulate It Properly
This is the step most DIY builds underestimate, and it's usually why saunas are slow to heat or can't hold temperature.
For a cold-climate outdoor sauna, you want R-13 to R-21 in the walls and R-30 to R-38 in the ceiling — heat rises, so the ceiling needs more. You also need a continuous aluminum foil vapor barrier on the warm side of the insulation, with every seam overlapped at least six inches and taped. Every penetration — wires, vents, anything that goes through the wall — gets sealed too.
The photos from this build show both R-13 Owens Corning Pink fiberglass batts and R-15 Johns Manville mineral wool on hand, along with rolls of foil bubble wrap for the vapor barrier. That combination, properly installed, is what lets the sauna reach temperature quickly and hold it without the heater running constantly.
For a deeper look at wall assembly specs and vapor barrier installation, the materials and construction module in the Tahoe Sauna Toolkit covers this in detail.
3. Build It Tall Enough
Interior ceiling height is the thing most people don't think about until it's too late. You need at least 7.5 to 8 feet of interior ceiling height to fit two or three bench tiers properly. The goal is to get the upper bench sitting 40 to 48 inches below the finished ceiling — that's the zone where heat accumulates. If the benches are too low, bathers are sitting below the heat output of the stove and the experience is noticeably worse: hot head, cold feet, weak steam delivery.
The finished interior in the photos shows a proper multi-tier L-shaped bench layout — upper, middle, and lower bench — with the heater in the corner and the upper bench elevated well above stove height. That geometry is what makes the thermal experience work.
A taller interior also means a taller exterior — a 7.5 to 8 foot interior ceiling with a pitched roof will put the exterior peak around 10 feet or higher. Worth thinking through before you start framing.
The Lesson
Building a sauna is complicated but not complex. There are a lot of small details — insulation, vapor barrier, bench height, ventilation, heater sizing — but the underlying strategy is simple. Build it sturdy. Insulate it well. Build it tall. If you're committed to understanding Finnish sauna design and you get those three right, you'll have a good sauna.
My first build proved that. It wasn't perfect, but it worked, and it's still working.
Frequently Asked Questions
How much does it cost to build a backyard sauna yourself? For a well-insulated outdoor shed-style sauna in the 6x8 to 8x8 range, expect to spend $4,000–$8,000 in materials if you're doing most of the labor yourself. That includes framing, insulation, interior cedar paneling, benches, a heater, a door, and windows. The electrical circuit for the heater should always be run by a licensed electrician — plan for $500–$2,000 depending on your panel location and how far the run is. A contractor-built version of the same sauna typically runs $8,000–$20,000.
What R-value insulation do I need for an outdoor sauna in a cold climate? For walls, R-13 to R-21. For the ceiling, R-30 to R-38 — heat rises, so the ceiling loses more if it's under-insulated. In a place like Tahoe, where it regularly drops below 20°F in winter, erring toward the higher end of those ranges is worth it. A continuous aluminum foil vapor barrier on the warm side of the insulation is non-negotiable — without it, moisture migrates into the wall cavity and you'll have problems within a few years.
How tall does a backyard sauna need to be? The interior ceiling should be at least 7.5 to 8 feet. That gives you enough room to position the upper bench 40 to 48 inches below the ceiling, which is where the heat accumulates and where the sauna experience actually happens. Lower than that and the multi-tier bench layout doesn't work well — you end up with benches too close to the stove level and a noticeably weaker thermal experience. Keep in mind that a proper interior ceiling height combined with a pitched roof means your exterior peak will be around 10 feet or higher.
Do I need a permit to build an outdoor sauna in Lake Tahoe? Almost certainly yes for the electrical work — a dedicated 240V circuit for the heater requires a licensed electrician and an electrical permit in virtually every jurisdiction. For the structure itself, it depends on size and your location. In the TRPA coverage area, structures under 10x10 may be exempt from a building permit but still count toward your land coverage limits, and those limits can get complicated depending on what else is on your property. The honest answer is: check with your local jurisdiction before you start framing.
Next Steps
If you're planning a DIY sauna build and want to get the design right before you start cutting anything, the Tahoe Sauna Toolkit walks through every decision — sizing, insulation, heater selection, ventilation, bench layout — with the same level of detail I used when designing my own.